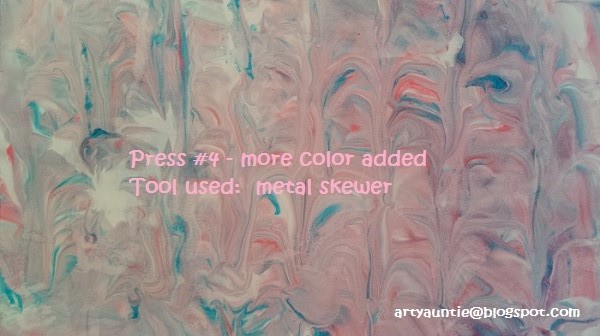
Oh what fun an artful, creative and glorious messy day I had playing with inks and shaving cream! Reminded me so much of the day I finally got my Gelli plate. I thought I would run out of paper before I ran out of steam for having fun!
 This week at Artful Journeys we want you to play with shaving cream
 to create fun and interesting background pages for your journals, notecards, ATC's or whatever you want to use the papers for.
After doing a significant amount of research on Pinterest about nearly every method of using shaving cream and "paint" -- I decided on a method for me.
THE BASICS: You will need a can of cheap shaving cream ($1 at Dollar Store); a jelly roll pan or cookie sheet with sides; a straight edge (like a ruler*), sturdy cardstock, Bristol or watercolor paper and some paper towels. You can use stationery, but it will curl due to the thinness of the paper. Bring in lots of paper. You will want to keep doing this it is so much fun!
THE COLORING PART: You can use many, many things to "color" your shaving foam to include: food coloring liquid, food coloring gels, alcohol inks, stamp pad ink refills (liquid), acrylic paint, & liquid watercolors to name a few. For my experiments, I used some Stampin' Up liquid ink refills. I have a shoebox full of them I got from my friend's estate -- so this was a perfect opportunity.
THE "TOOLS" I USED: Since I was in the kitchen, I opened up my utensil drawer and drew out a long icing blade, a metal skewer, a butter knife, an icing rake, a scalloped-edged biscuit cutter, two sizes of rubber spatulas, a wide metal spatula (my best egg turner!) and a small flat spreader.
PREP: To do my backgrounds, I went to the kitchen. I had watched several videos and knew I did NOT want to do this at my art desk. First, not enough room, and secondly, I needed to be able to handle a messy substance.
Clear off space on your kitchen counter. Beside the sink is really helpful (or to me, anyway). Put your cookie sheet out and squirt a goodly amount of shaving cream into the pan so that it will fill the pan to about 1/2" thick and clear to the edges and smooth lightly with the tool of your choice.
Add drips, lines and squiggles of your coloring material. See above for suggestions. I used some re-inker inks for mine.
Now, with the tool of your choice, draw lines or swirls until you are satisfied lightly mixing the colors. I got a bit carried away with this bit a time or two and "over mixed" causing too much muddling of the colors at times, but I don't think it makes that much difference. In the design, perhaps--depends I suppose on how much blending and lines and swirls you want in the final lift. I was playing so I wasn't too picky about the design at this point.
Lay your paper on top of your shaving cream, and press lightly so that all the paper gets covered. Lift carefully off the foam. You can create different effects by straight lifts, dragging, etc.
If you get big white spaces, just repress onto the foam.
Once you lift it off, you will be scraping off the foam. This is why I wanted to be at the kitchen sink. My first press, I used a ruler to scrape off the foam and rinsed it off the ruler in the kitchen sink. I particularly didn't like the scraping method with the ruler, although very effective at getting more of it off all at one time in a big sweeping motion. So I switched to my big wide spatula. Once I scraped most of it off, just wipe the edges and across the page with a paper towel to remove any leftover foam. Lay your page off to the side to dry (it will dry rather quickly). If it starts curling, roll or curl into the "flat" position, and lay on flat surface. You can always weight it if you need to do so.
 |
| Rinsing really made this more pastel in color |
This process is so much fun! Get another piece of stock and play some more. You can see in my photos, I really played around with this stuff. I smoothed; didn't smooth; added more color; didn't add more color.
Each lift will be a little bit lighter. Bored with your first colors, rinse off in the sink, dry your pan and do it all again with a different color palette.
Here is where I changed my color palette as the pink, red and blue was getting rather muddied. I started this set with a bright green and yellow.
After the first press, I added a Kiwi green that turned out to be rather dark, but I ended up liking it a lot. I think I can do a lot with this one.
This next one, I used a wide icing spatula to smooth out the top which blended the greens a little more, but not too much. Use a light hand. I liked the color blending. It turned more of a soft celery green, with some of all 3 colors peeping out.
For this next press, I added a few more dots of that kiwi color and then used a wide rubber spatula and smoothed the top out again, further blending the colors, then made cross-hatch marks with a bread knife. Loved how the lift turned out with a softer, more celery-green color, but still showing the white spaces.
And for the last press, I smoothed the top one more time. It was getting rather pale, but I am still in love with the color. Using a small rubber spatula, I dragged it through the pan, creating peaks and valleys and a few swirls.
This was so much fun...and I could have kept going and going like the Energizer Bunny. It's fast. It's no-brainer easy. Next time, I am breaking out all my food coloring and food coloring gels and play with those.
I can't wait to make some fun journal pages with these marbelized papers. I think the backgrounds will be awesome.
Keep it artful everyday!
ARTY AUNTIE
~~Betty